ManicTime Server v1.0
ManicTime server is used to share data between different ManicTime installations. To use the server you need to have ManicTime Pro license, server itself is free of charge.How server works
On each ManicTime installation you can choose which timelines you want to publish to the server. When you publish a timeline, all information is transferred to the server. Once it has transferred to the server, you can import it on any ManicTime installation. There is no limit on a number of timelines which can be published to the server and no limit to how many timelines you can import into ManicTime. Currently however ManicTime UI is not well suited for a large number of timelines.In the first version, server is best used for the following scenarios:
- Single user working on multiple machines - Publish data to the server from multiple machines, then load it on one machine
- Multiple users sharing tags - Users can publish Tag timeline, then run reports on all tags with TimeSheet
- Integration with other applications - Users can publish data to the server, then some application can query the server and retrieve whatever data it needs
Database
By deafult server is using SQL CE for database. If more than three ManicTime instances will connect to the server we recommend that you use MS SQL Server.
Authentication
In terms of authentication we kept things simple for the first version, so server is relying on Windows authentication. There is also no way for user to define who can see timelines, by default timelines are only visible to the user who published them.
There is an exception, you can provide a list of admins who have access to all data on the server.
How to get it running
ManicTimeServer is in a zip file, download it and copy contents to some folder. Run ManicTimeServer.exe (you need admin rights for the first start). For real usage, we recommend that you install and run it as a service. You can stop it by pressing Esc or by closing console window. By default server is running on port 8080, you can change that in ManicTimeServer.exe.config.
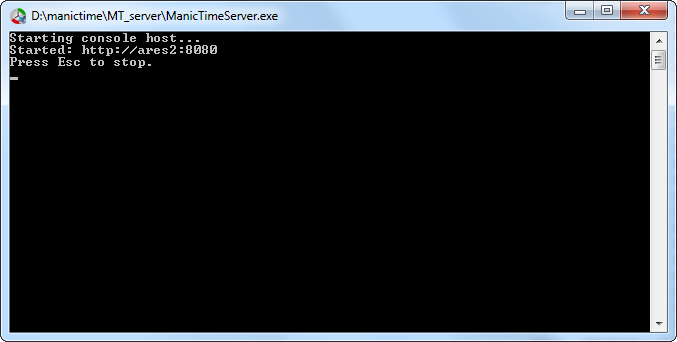
|
| Server console output |
Establish connection to the server
Next open ManicTime. Now we need to connect to the server. Go to Tools and settings -> Manage servers and add a new server. For url type whatever is displayed in the console, if the server is running on the same machine you can also use http://localhost:8080 If the server is running locally (or in the same domain) you can use Current user for authentication. If it is not, you can read more about authentication here.
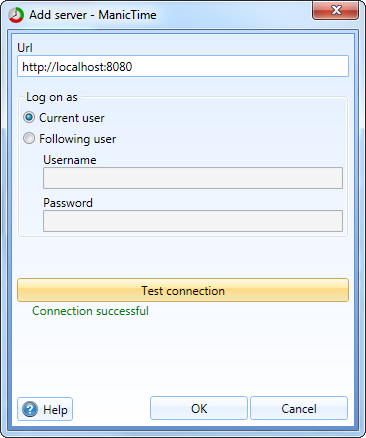
|
| Add server window |
Publish data to the server
Next we can use the server to transfer some data. Go to Timelines Editor. Notice publish links next to Timeline name. Click on one and data will start transferring to the server.
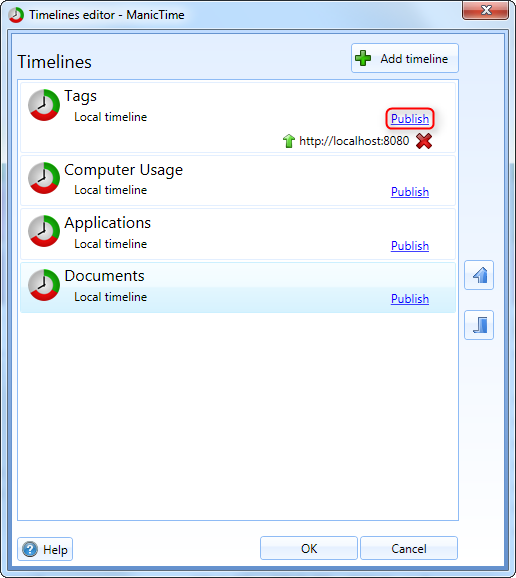
|
| Publish timeline |
In status bar you can also see how much was transferred.

|
| Publishing status bar |
Import data from server
Now that we have some data on the server we can import it. Lets try to import the same timeline we just published. Again open Timelines editor. Click on Add timeline and choose ManicTime Server type.
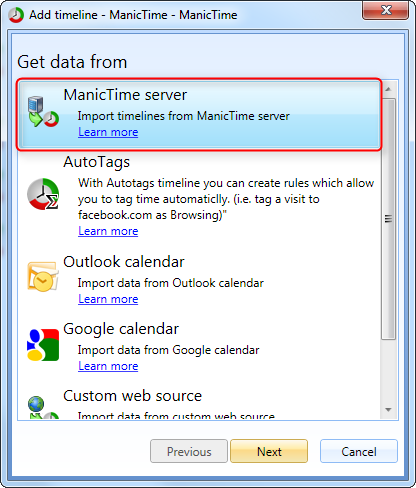
|
| Choose timeline type |
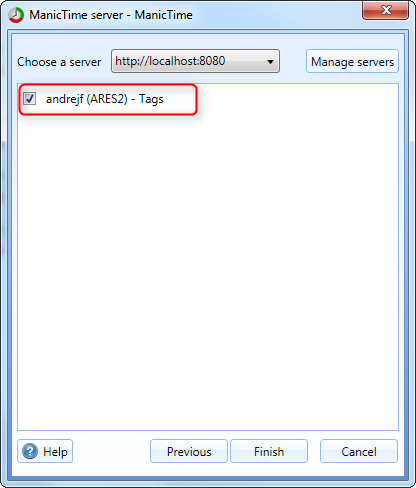
On the list of timelines you will see all timelines on the server which you have access to.
|
| Choose which timelines to import from the server |
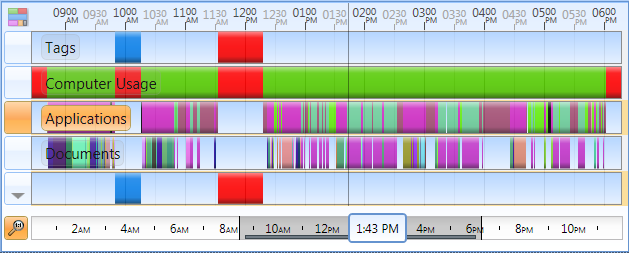
The timelines you check will be added to Day view. In the bottom picture, top timeline is Tags timeline loaded from local database, bottom timeline is Tag timeline which is loaded from the server.
|
| Timeline imported from the server |
TimeSheet for multiple users
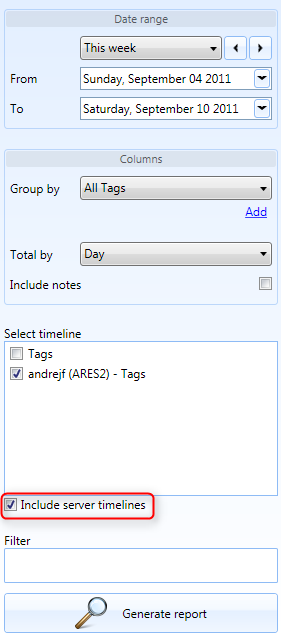
Once you establish a connection with a server, you can run TimeSheet reports on all Tag timelines you have access to. On TimeSheet click on Include server timelines, then choose timelines for which you want to generate a report.
|
| TimeSheet - Include server timelines |