Global shortcuts allow you to define a system wide shortcut to start actions within ManicTime. Currently you can define shortcuts for the following actions:
- Open main window
- Start stopwatch
- Stop stopwatch
- Toggle off/on the record
- Tag last untagged time
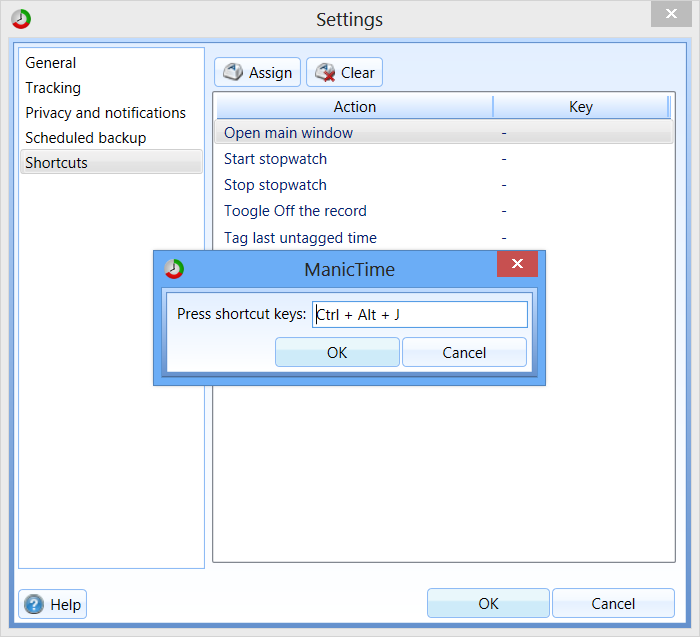
You can set shortcuts in Settings -> Shortcuts.
To set a shortcut: click on action to select it and click Assign. To set CTRL-ALT-J for example, press J while holding down CTRL and ALT.
|
|
Setting a shortcut
|
Up until now autotag could be one of two types:
- Regular - It will match a rule then create an Autotag with selected name
- Absorbed - It will match a rule, then rename the autotag as an autotag it is absorbed with
Now an autotag can also be of type Append. Lets explain it on an example, lets say we have these two autotags:
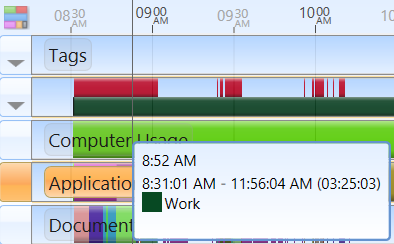
- Computer usage timeline - Active time -> autotagged as "Work"
- Applications timeline - IE -> autotagged as "Browsing"
These two autotags overlap, since while you are browsing you are also active. By default those two tags will be shown on two separate lines.
|
|
Overlapping autotags
|
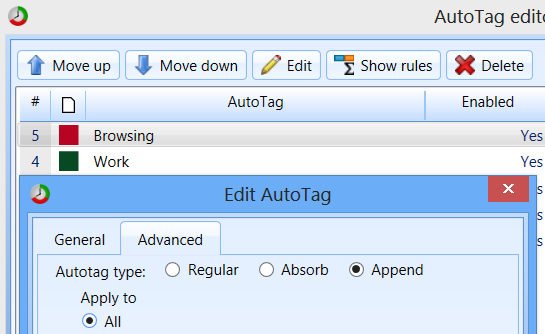
Lets now change the "Browsing" autotag to type Append in Autotag editor.
|
|
Change autotag to Append type
|
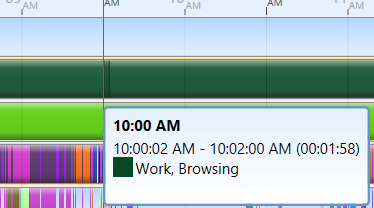
Once we change it to Append, it will be appended to "Work", so on some sections you will see only "Work", on some "Work, Browsing"
|
|
"Browsing" is appended to "Work"
|
Append autotag only works if another autotag is matched to the same time range, it will not show up by itself.
You can now add notes to autotags.
Let’s take a complex example which will use all of the above features, let’s say you use Excel and Word when you work for your clients. Let’s also say you save the documents in folders by client and project
                C:\Client 1\Project 1\some docs...
                C:\Client 1\Project 2\some docs...
                C:\Client 2\Project 3\some docs...
                C:\Client 2\Project 4\some docs...
First lets try to create a simple autotag. Lets tag all Word and Excel usage as "Work" and lets add document we were working on to Notes. How do we do this?
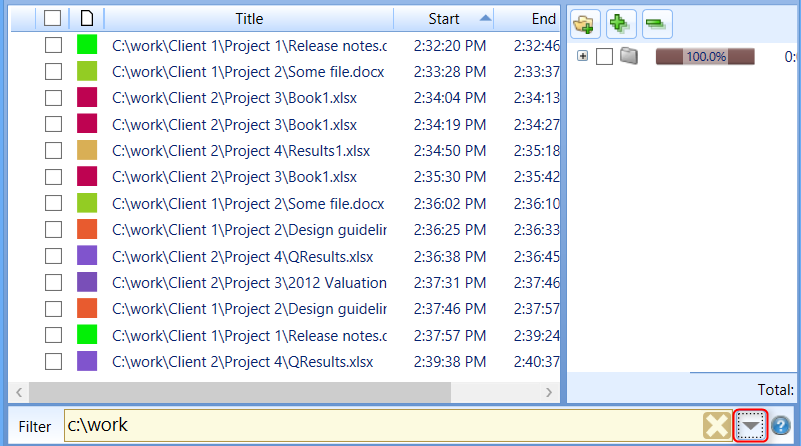
First we are going to filter Document timeline so only documents from the mentioned folders show up. You can do this by typing c:\work to filter.
|
|
Filter document timeline
|
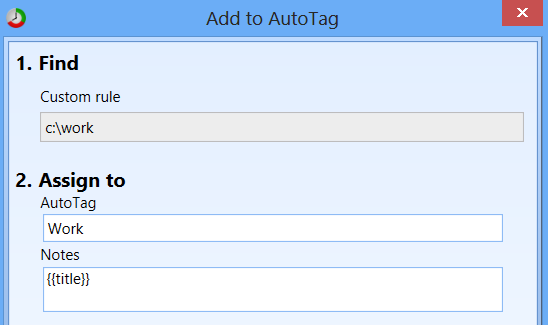
You can use this filter to create autotag. Click on the arrow facing down on the right side and choose Add to autotag.
For autotag write "Work" and for the notes use a special keyword {{title}}. This will insert any title which was matched by the rule.
|
|
Autotag with document title in notes
|
So after we do this our autotags are:
Autotag: "Work", Notes: "C:\work\Client 1\Project 1\some doc.docx"
...
We used {{title}} to insert document name to notes. The other reserved keyword is {{group}}. To understand the difference take a look at the Day view. Below the timelines on the left are details about activities,
on the right are summaries. So for example on Applications timeline on the left are window titles, on the right is the application to which the titles belong.
So {{title}} will take the value on the left, while {{group}} will use the value on the right. You can use both keywords in Notes or in name of autotag.
We accomplished something, but we can make it better. Since we store documents based on client and project, wouldn’t it be great if we could use this for our autotags, so we would get something like
Autotag: "Work, Client 1, Project 1", Notes: "filename"
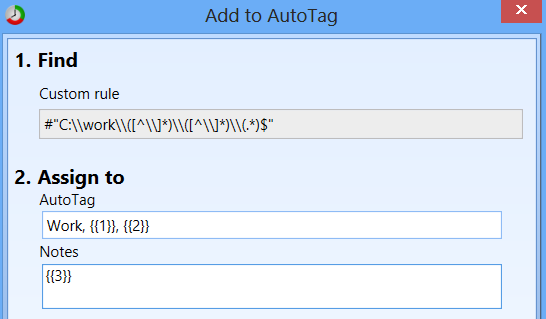
ManicTime now supports regular expressions and we can use them to parse the filename. To write regex you need to enclose it in #"regex". So in our example we will use
#"C:\\work\\([^\\]*)\\([^\\]*)\\(.*)"
I wont go into much details about regular expressions, you can read more about them
here.
In short, there are three capturing groups inside the regex, which we can use in our autotag as {{1}}, {{2}}, {{3}}
|
|
Use regex for autotags
|
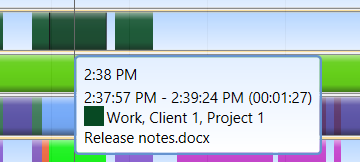
So now we get what we set out to do.
|
|
Autotags show Client, Project and filename
|
Lets do one more thing, lets say we want to know which application those docs were created with, was it Excel or Word? We will use Append tag for this. Right click Word on Apps timeline, choose Add to autotag and type Word. Then do the same for Excel.
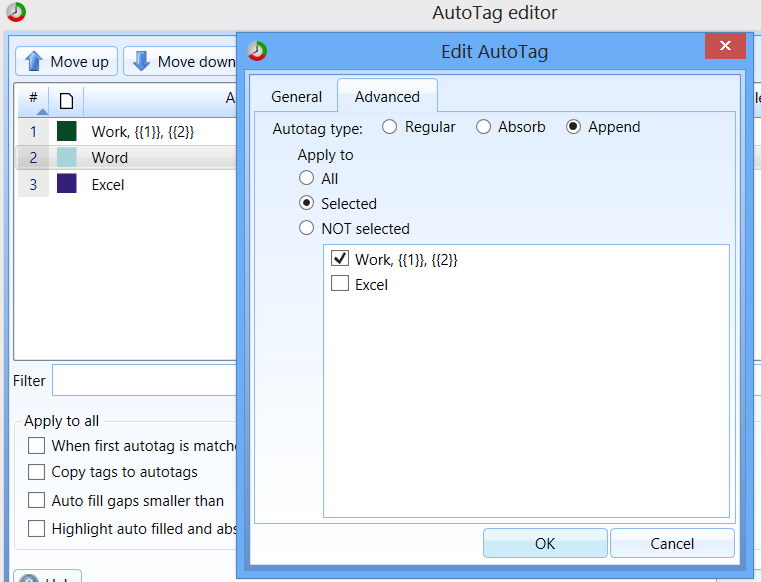
In the Autotag editor select Word autotag, choose Edit and on Advanced tab choose Append and apply to selected and choose "Work, {{1}}, {{2}}".
|
|
Append Word usage to "Work"
|
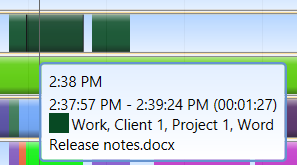
Then do the same for Excel, once you’re done you’ll get this.
|
|
Autotags show Client, Project, application and filename
|
So now you know for which client and project you were working, in which app you were working and also which document.
If you right click on ManicTime icon in the system tray, there is a new shortcut Tag last untagged time.

|
|
Tag last untagged time
|
You can use this to quickly tag time spent from the end of last tag. So time of new tag will be set to:
Start time - end of last tag. If no tags exist for the current day, it will default to first usage of computer for the current day.
End time - current time
Clicking Add tag (without time selection) in ManicTime will also set default time values to the ones mentioned above.
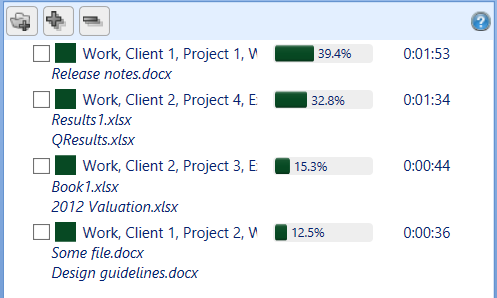
Tags timeline summary view will now show first 30 chars of notes under the title.
|
|
Tags summary view
|
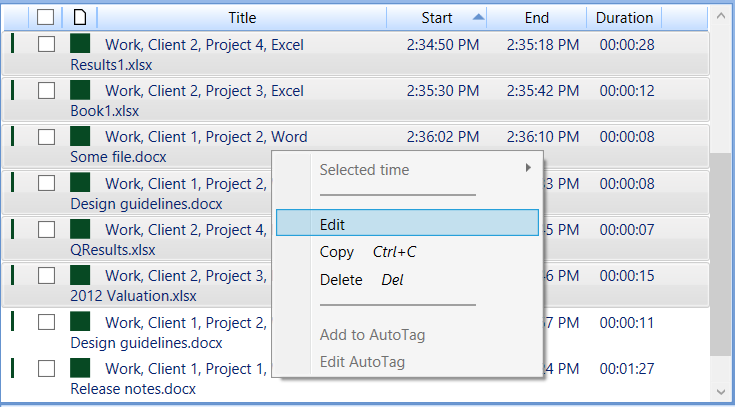
You can now select multiple tags with Ctrl (or Shift) select, then right click on selection and choose Edit. This will edit all selected tags.
|
|
Editing multiple tags
|
If you double click on a tag in details view it will open edit view.
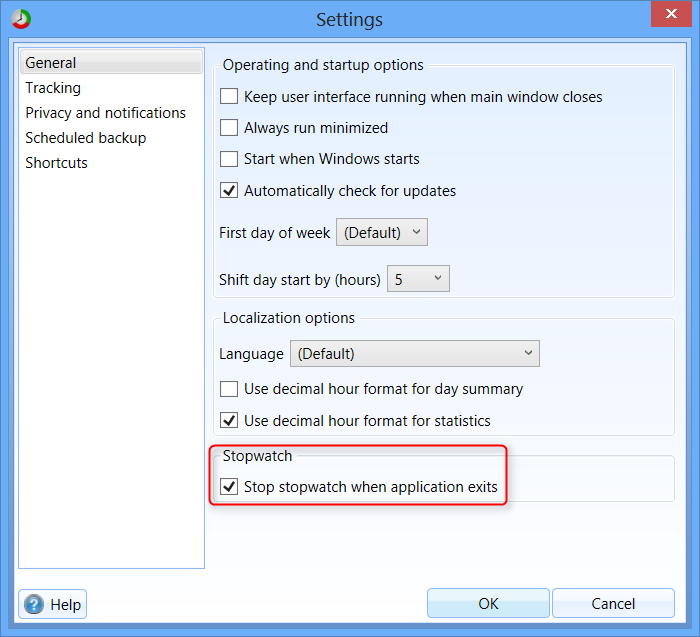
If you start stopwatch and exit MT, stopwatch is stopped next time you start MT.
If you would like for stopwatch to persist even when you stop MT, you can uncheck the setting Stop stopwatch when application exits on the Settings -> general tab.
|
|
Persist stopwatch through reset
|
To use regex in filter and advanced search enclose it in #"". So for example to select all you could write #".*" in filter.

|

|

|
|
Stopwatch icon
|
Lock icon
|
Off the record icon
|
We finnaly added a restore option. Now if you lets say install new windows, you only need to backup on the old machine and restore on the new one.

|
|
Restore data
|


